Saturday, January 30, 2010

Windmills Doily, Completed TIAS, And Another Orchid Photo

I know, I know. I said I could post last week, and I didn't. I would have, but I forgot my camera here in the city, and couldn't take any photos of my completed work. Also, I seem to have caught a cold (AGAIN!) or my first one came back. I'm not quite sure, so I haven't done much tatting this week. I'm kinda bummed out, but then again I didn't get a cold last year.

I'm sure everyone by now is aware of the passing of beloved tatter and designer Mary Konior. I too am a big fan of her and her tatting designs. While I never met her, or had the opportunity to see her tatting in real life (the latter is still possible since HBT's founder Sue Hanson was given the honour of caring for the lace, and brings it to tatting events for all to see), I am proud to own two of her tatting books, Tatting Patterns and Tatting With Visual Patterns. Since hearing of her passing, I have made it a goal of mine to find the other two books. Hopefully I can manage this without spending a large amount of money (what are those people on eBay and Amazon thinking!!!!!!!!). Anyway, Rest In Peace Mary. Hopefully you are tatting with the other tatting legends that left the Earth before you did.

As you all know, I have been tatting Mary's Windmills motif lately. I also mentioned that I wanted to make a small doily using that motif. As a tribute to Mary Konior, here is the completed doily:


As you can see, the reason Mary called the pattern "Windmills" really shows once you have several joined together. A windmill is very evident in the centre of the doily. While I said the doily is complete, that isn't technically the case. As pictured above, the doily is about 6 1/4 inches in diameter. That's too small for my purpose, so I'm going to add another round of motifs. That will be another 12 motifs to make. Of course, once that round is done, I may decide to add another. I show you how it looks once I'm done the next round. I am using DMC Cordonnet size 20 thread to make this doily.

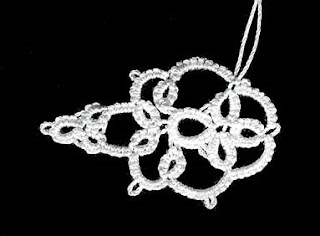
I have also completed Jane TIAS 2010. I'm terrible with the daily progress so we will go straight to the finished motif.

As you can see, our mystery motif turned into a rooster. I was beginning to wonder partway through, but it began to look kinda bird like towards the end. For this motif, I used Lizbeth size 20 in colour numbers 656 (Dark Wedgewood Blue) and 142 (Turquoise Twist), along with DMC Cordonnet size 20 (White). I'm actually quite pleased with my colour choices (especially since I didn't plan ahead and just picked a colour when they were needed). This will be Motif # 16 of my Third 25 Motif Challenge.

Finally, I have another orchid photo to share with you. This is a relatively new addition to my collection. First, the whole spray:

Next, just a single flower:

This particular orchid is a Cymbidium. More specifically, the plant is called Cymbidium [(Via Ireland 'Delightful' x (Pendragon x Camelia 'Yellow Sunset')] 'Shamrock'. Whew. That's quite a name. I find the green colour of the flowers quite nice. While this is only my second one, I'm getting quite fond of this genre of orchid. I think it's their large size, and their relatively easy care that probably has something to do with it. I may have to get another one.

Before I forget, I would like to thank everyone who has commented over the past few weeks. I haven't had a chance to comment lately. In particular, I would like to thank Miranda for her suggestion on eliminating the little dots of colour on my colorized Windmills motif I posted about earlier. Miranda suggested using a "Slope and Roll" join. See this page: (http://www.ds9designs.com/patterns_free.shtml). Scroll down to the bottom of the page for the link. I tried it out on another pattern and it seems to work well. I'll try it out on another Windmills motif and post my results.

Well, that's it for now. Hopefully, I'll post again soon. Till next time.

Sunday, January 17, 2010

Windmill Motif, TIAS 2010 Progress, and The Return of The Mutated Orchid

Before I begin this post, I am pleased to announce that I am feeling much better. I felt absolutely terrible on Sunday and Monday. It probably didn't help that I went to work despite not feeling well. But by Wednesday, I was beginning to get better. Sorry for the health update, but I didn't want anyone to worry. Um, you were worried right? Anyone?

As I mentioned in my previous post, I planned to retat Mary Konior's Windmill motif, using white thread. Well here it is:


I really like the motif in white, although any solid colour may work well with this design. Though, I think the main problem I have with my previous attempt of the motif was with the little dot of colour that occurs at the base of the many shuttle/lock joins that are needed in the pattern. Hopefully you know what I'm talking about. I have been playing around with other joining methods to prevent the dot of colour. What I'm trying is when joining to pull the thread from the front to the back. It seems to help, but if anyone else has a suggestion, I'd love to hear it. Thread stats: DMC Cordonnet size 20 in white. I am planing on making a small doily, consisting of seven motif. Of course, I may decide to join more motifs once I have the seven done. I'm not counting this in my current 25 Motif Challenge since I already counted the other one.

Next on my list is Jane's TIAS 2010. I have skipped the last few TIASes, so I am trying to keep up with this one. I love the concept of the TIAS. You tat a little bit of a pattern every few days, until you are done. You don't know what you are tatting, until you are close to the end (usually); Jane, and the other ladies who have hosted a TIAS are pretty good at hiding the identity of the motif. So here is my current progress:


The top image is my progress after Day One, and the bottom one is after Day Two. I'm using Lizbeth size 20 thread in colour #142 (Turquoise Twist). The next three days will not be shown individually. I, um, forgot to scan the piece after I did each days tatting.

Here is Days 3, 4, and 5. I used DMC Cordonnet size 20 in white for these days. And, as you can see by the two ends showing, we aren't done with this piece. While the previous piece looks intriguing, these three days looks especially interesting. I'm still not sure what we are making, but I can't wait to find out.

Finally, I will end this blog post with an orchid photo. As the title suggests, the new year welcomes the return of The Mutated Orchid:

I love this orchid. As I mentioned in the first post about this orchid, it is a Phalaenopsis orchid with a mutation that causes the plant to have three lips instead of one. This is referred to as a Peloric mutation. I'm glad that the plant produced the mutated flowers again, but I guess it should since the plant re-bloomed on the same flower stalks as the last time. Which, while writing this post I realized that it has taken the plant about 15 months to re-bloom. I'm pretty sure it takes less time to happen, but I guess the mutation could have caused it to take longer. No matter; I'm just glad it has produced more flowers.

That's all for now. I'm not sure if I'll get a post up next week. I am going to my parents next weekend (well, I'm leaving Thursday after work) to pick up a new truck. My dad had the opportunity to buy my grandmother's truck off of her estate, and he's letting me buy his truck off of him (which is a 2006 model while the one he bought is a 2009 model). But we'll see. My parents also recently had a satellite internet service installed, which will provide a high speed service to their farm, so a post is possible. Till next time.

Friday, January 8, 2010

More Christmas Tatting, New Years, and Other Stuff

I think the title covers everything I'm going to talk about. First of all, Happy New Years! I hope the start of 2010 is being good to everyone. I would have posted earlier, but I haven't been feeling good since New Year's Eve. Right now, I'm in the middle of a full blown cold, which has left me pretty much drained of energy for the past few days. Lately, my daily routine seems to be go to work, come home, sleep. But enough about me, let's move on to the tatting.

I think I mentioned in my last post that I had one motif left to show you from the tatting I did over Christmas. However, I forgot about one, so I actually have two motifs. The first motif is a "snowflake". I put the word snowflake in quotation marks because I don't think Mary Konior intended the motif to be used that way. The motif in question is Mary's Windmills motif:


I used Lizbeth size 20 in colour number 128 (March Breeze). Before anyone says anything about my colour choice, let me explain. I though it would look good. OK, I'm now ready to hear your comments. Honestly, I don't hate the way it turned out, but I'm not sure I'm lovin' it either. It kinda grows on you after a while. Except for the six rings in the middle, the patterns consists of all chains. I will be making this again-in white. This is motif 13 of my Third 25 Motif Challenge. And before I forget, the pattern is from MK's Tatting with Visual Patterns.

The next motif is also from Tatting with Visual Patterns. It is the Masquerade Motif.

This was tatted with Lizbeth size 40 colour number 100 (Falling Leaves). I like the way this motif turned out. This is another of Mary's motifs that would make an awesome bookmark when several are joined together in a strip. Which I plan to do sometime. This will be motif 14 of my 25 Motif Challenge.

Recently (ie: last weekend) I began to tat from my newest tatting book. That book would be Ruth Perry's Celtic Tatted Leaves and Flowers. There are a number of really interesting designs in this book. Some pretty easy, to a few that are substantially harder. All beautiful. I have tatted three different leaf patterns for your (and my) enjoyment.

The first leaf that I tatted is an Arrowhead or heart shaped leaf. This is probably the simplest design in the book. Ruth has a picture in the book showing several leaves and a couple curly tendrils attached to a stem. I think this is a really cool way of using this pattern. One could tat several long (and short) lengths of leaves and stems and display them in a decorative pot.

The next leaf that I tatted is the Elm or Rose leaf. It is slightly more difficult design than the previous one, but not by much. As you can see, Ruth used what she calls the Celtic Twist to make the centre of the leaf. She uses this type of Celtic knot in a number of her designs, most notably the Celtic Snowflake that she shared with us last year, and the Celtic Maple Leaf that many of you probably have seen before. And speaking of the Celtic Maple Leaf:

You knew I had to tat this pattern, didn't you? Like many, I have been waiting for the pattern to be available. Despite its looks, it isn't terribly hard. There is one small section that uses the same technique as split chains, and I'm sure you can use a regular chain if you want to instead. I really like this leaf and I plan of making it again. In case you are wondering I used Lizbeth size 20 thread in colour # 684 (Light Medium Green) for all three leaves. I am also going to count all three motifs as Motif #15 for my 25 Motif Challenge.

There, I'm finally done writing this post. Its taken me almost three days to write it due to my cold. Right now, my heads all stuffed up and I am contantly getting a sensation that I am going to sneeze, but I don't, which is getting really annoying. I'm not sure if I will get much tatting done this weekend. I did a little bit this afternoon, and I'm also tatting Jane's TIAS (which I need to scan before moving on to the next part). I received a request for a chainmaille necklace through Etsy, which I plan on working on tomorrow. I'll show you pictures once I'm done. Well, that's all for now. Till next time.


----------------
Now playing: The BBC National Orchestra of Wales - All the Strange Strange Creatures (The Trailer Music)
via FoxyTunes